
In the LocomotiveCMS such assets as images are available as well. Often while uploading an image via admin panel user needs to crop/resize an image. In this post we provide several examples how to do achieve it easily.
So, here bellow there are several variants how to do it even in LocomotiveCMS:
1. Some Liquid filters will allow you to format your entries attributes.
Resize image:
An image rendered from a file's field is done this way:
<img src="{{ item.attached.url }}">
But the the DragonFly gem can resize any image on the fly behind the scene. The url to the dynamically resized image is returned. The processing relies on ImageMagick. Here is an example:
<img src="{{ item.attached.url | resize: '100x100' }}">Just add the "resize" filter, which takes the ImageMagick geometry string for argument. Here is a list of arguments examples taken from the Dragonfly doc:
'400x300'            # resize, maintain aspect ratio
'400x300!'           # force resize, don't maintain aspect ratio
'400x'               # resize width, maintain aspect ratio
'x300'               # resize height, maintain aspect ratio
'400x300>'           # resize only if the image is larger than this
'400x300<'           # resize only if the image is smaller than this
'50x50%'             # resize width and height to 50%
'400x300^'           # resize width, height to minimum 400,300, maintain aspect ratio
'2000@'              # resize so max area in pixels is 2000
'400x300#'           # resize, crop if necessary to maintain aspect ratio (centre gravity)
'400x300#ne'         # as above, north-east gravity
'400x300se'          # crop, with south-east gravity
'400x300+50+100'     # crop from the point 50,100 with width, height 400,300
Resize filter lets us serve resized images. To be clear: this image isn't being resized with CSS or HTML. The image is resized with Imagemagick to given specifications and then cached so that it can be instantly served to visitors.
This is a huge timer saver. What if the design changes again and we want use a different size of the image? Just change the resize string. Want to crop it? Change the resize string. Want to serve different sizes of the same image depending on their screen resolution using CSS? One image, several resize strings. And this isn't even getting into its uses with images uploaded by site editors where you can't first use your image editor, even if you wanted to.
Resize strings use the basic format of width x height and are measured in pixels.
So, the uploaded image will be always shown in the predefined size parameters.
2. Also as a variant user may want to paste images inside the text, which is in some editable text element. As a rule such texts are editable via text editors / redactors, which could be presented as HTML. So here user could easily reach such images parameters as width and height, and set any preferable values. See below:
<p><imgsrc="/sites/5c2e3480e138231653bad042/assets/5c5321bee1382348a628a22e/volvo.png"alt=""width="146"height="97" />Securee helps to save credentials for your service in few simple steps. It allows generating different types of passwords, sharing credentials with friends and colleagues via Emails. Don't beat your head with a new password – just click one button and Securee will generate it for you. Make remembering passwords easy with Securee.</p>
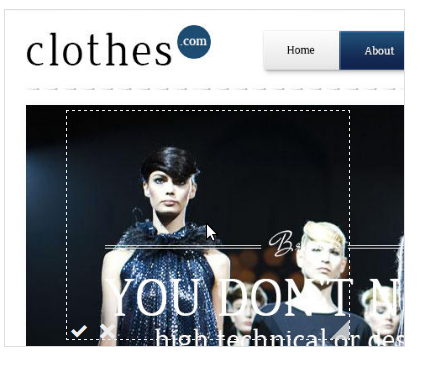
3. imgAreaSelect
imgAreaSelect is a jQuery plugin for selecting a rectangular area of an image. It allows web developers to easily implement image cropping functionality, as well as other user interface features, such as photo notes.
Plugin features:
The plugin works in all major browsers, including Firefox, Opera, Google Chrome, Safari, and Internet Explorer.
The plugin is invoked by calling the imgAreaSelect() method on a jQuery object that represents an <img> element, see example bellow:
<script type="text/javascript">
$(document).ready(function () {
   $('img#photo').imgAreaSelect({
   handles:true,
   onSelectEnd: someFunction
});
});
</script>
If there is more than one element in the jQuery object, the plugin will be enabled for all elements in the set. This applies to non-image elements as well, as imgAreaSelect can actually be used with any block element (e.g., a <div> with a background image).
You can initialize the plugin either in the $(document).ready() or $(window).load() event handler.
4. Also there are several alternative plugins such as:
* picEdit : jQuery front-end Image editor Plugin
The plugin will turn your form's <input type="file"...> box into a tiny image editor / uploader. Perform basic image operations and preview your image before uploading to the server. The functionality for the plugin is very similar to the one introduced in pasteboard.co website and photobooth.js library.
Include jquery, the plugin js and css files:
<link rel="stylesheet" type="text/css" href="dist/css/picedit.min.css" />
<script type="text/javascript"
src="//cdnjs.cloudflare.com/ajax/libs/jquery/1.10.2/jquery.min.js"></script>
<script type="text/javascript" src="dist/js/picedit.min.js"></script>
Create a form in your html code with the file upload input box ex.:
<form action="upload.php" method="post">
   Name: <input type="text" name="name">
   Image: <input type="file" name="image" id="image">
   <button type="submit">Submit</button>
</form>
Bind the plugin to the file upload input box and that's all.
<script type="text/javascript">
   $(function() {
      $('#image').picEdit();
   });
</script>
Also there are built-in useful methods and option available such as: defaultImage, maxWidth, maxHeight, redirectUrl, imageUpdated, formSubmitted, etc.
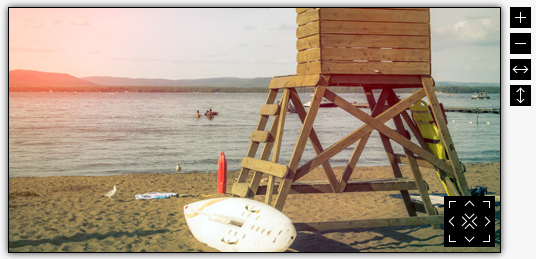
* Cropimg: jQuery Cropping Plugin
Another cropping jQuery plugin. Catch image inside the box and move it. You can also zoom in or zoom out the photo by the buttons on the right side.
How to use?
$(function(){
   $('img.my-image').cropimg({
      resultWidth:400,
      resultHeight:200,
      inputPrefix:'ci-'
   });
});
* Resizing and Cropping Images with HTML5 Canvas
Possibility to resize and crop an image using the HTML5 <canvas> element.
There are a lot of available examples how to do differ modifications with images, one of them is
Cropping the image
Rather than allowing users to crop the image to any size and shape, let’s create a frame that is the exact dimensions we require and ask users to position the image inside that frame. This gives them control over the zoom and framing, yet ensures the final image always the same size and shape.
To do this we need to add the following HTML:
<div class="overlay">
   <div class="overlay-inner">
   </div>
</div>
<button class="btn-crop js-crop">Crop</button>
The styles for the overlay box are important, particularly its position, width and height as they are used to determine what part of the image is cropped. It’s also important to remember that the frame should always be visible on any background color. That is why I used a semitransparent white outline around the main box in my example:
overlay {
    position: absolute;
    left: 50%;
    height: 200px;
    border: solid 2px rgba(222,60,80,.9);
    box-sizing: content-box;
    pointer-events: none;
}
.overlay:after,
.overlay:before {
    content: '';
    position: absolute;
    display: block;
    width: 204px;
    height: 40px;
    border-left: dashed 2px rgba(222,60,80,.9);
    border-right: dashed 2px rgba(222,60,80,.9);
}
.overlay:before {
    top: 0;
    margin-left: -2px;
    margin-top: -40px;
}
.overlay:after {
    bottom: 0;
    margin-left: -2px;
    margin-bottom: -40px;
}
.overlay-inner:after,
.overlay-inner:before {
    content: '';
    position: absolute;
    display: block;
    width: 40px;
    height: 204px;
    border-top: dashed 2px rgba(222,60,80,.9);
    border-bottom: dashed 2px rgba(222,60,80,.9);
}
.overlay-inner:before {
    left: 0;
    margin-left: -40px;
    margin-top: -2px;
}
.overlay-inner:after {
    right: 0;
    margin-right: -40px;
    margin-top: -2px;
}
.btn-crop {
    position: absolute;
    vertical-align: bottom;
    right: 5px;
    bottom: 5px;
    padding: 6px 10px;
    z-index: 999;
    background-color: rgb(222,60,80);
    border: none;
    border-radius: 5px;
    color: #FFF;
}    top: 50%;
    margin-left: -100px;
    margin-top: -100px;
    z-index: 999;
    width: 200px;
    height: 200px;
    border: solid 2px rgba(222,60,80,.9);
    box-sizing: content-box;
    pointer-events: none;
}
.overlay:after,
.overlay:before {
    content: '';
    position: absolute;
    display: block;
    width: 204px;
    height: 40px;
    border-left: dashed 2px rgba(222,60,80,.9);
    border-right: dashed 2px rgba(222,60,80,.9);
}
.overlay:before {
    top: 0;
    margin-left: -2px;
    margin-top: -40px;
}
.overlay:after {
    bottom: 0;
    margin-left: -2px;
    margin-bottom: -40px;
}
.overlay-inner:after,
.overlay-inner:before {
    content: '';
    position: absolute;
    display: block;
    width: 40px;
    height: 204px;
    border-top: dashed 2px rgba(222,60,80,.9);
    border-bottom: dashed 2px rgba(222,60,80,.9);
}
.overlay-inner:before {
    left: 0;
    margin-left: -40px;
    margin-top: -2px;
}
.overlay-inner:after {
    right: 0;
    margin-right: -40px;
    margin-top: -2px;
}
.btn-crop {
    position: absolute;
    vertical-align: bottom;
    right: 5px;
    bottom: 5px;
    padding: 6px 10px;
    z-index: 999;
    background-color: rgb(222,60,80);
    border: none;
    border-radius: 5px;
    color: #FFF;
}
Update the JavaScript with the following function and event listener:
init = function(){
    //...
    $('.js-crop').on('click', crop);
};
crop = function(){
    var crop_canvas,
        left = $('.overlay').offset().left - $container.offset().left,
        top =  $('.overlay').offset().top - $container.offset().top,
        width = $('.overlay').width(),
        height = $('.overlay').height();
    crop_canvas = document.createElement('canvas');
    crop_canvas.width = width;
    crop_canvas.height = height;
    crop_canvas.getContext('2d').drawImage(image_target, left, top, width, height, 0, 0, width, height);
    window.open(crop_canvas.toDataURL("image/png"));
}
The crop function is similar to the resizeImage function however instead of passing it height and width values we get the height and width from the overlay element.
For cropping, the canvas drawImage method requires nine parameters. The first parameter is the source image. The next four parameters indicate what part of the source image is used (the clipping box). The final four parameters indicate where on the canvas to start drawing the image and at what size.
* Picture Cut: jQuery plugin that Upload Drag & Crop Image
Picture cut is a jquery plugin that handles images in a very friendly and simple way, with a convenient interface based on bootstrap or jquery ui, has useful features like ajax upload, drag image from explorer, image crop and others.
How to use it:
Include files and dependencies in such order:
<link rel="stylesheet" href="dependencies/bootstrap-3.2.0/css/bootstrap.min.css">
<!--for bootstrap theme-->
<script src="dependencies/jquery/jquery-1.11.1.min.js"></script>
<script src="dependencies/bootstrap-3.2.0/js/bootstrap.min.js"></script>
<!--for bootstrap theme-->
<script src="dependencies/jquery-ui-1.11.1.custom/jquery-ui.min.js"></script>
<script src="jquery.picture.cut/src/jquery.picture.cut.js"></script>
The plugin must be instantiated in a div, it will work as a container:
<div id="container_image"></div>Instantiating the plugin, basic mode:
$("#container_image").PictureCut({
InputOfImageDirectory : "image",
PluginFolderOnServer : "/jquery.picture.cut/",
FolderOnServer : "/uploads/",
EnableCrop : true,
CropWindowStyle : "Bootstrap"
});
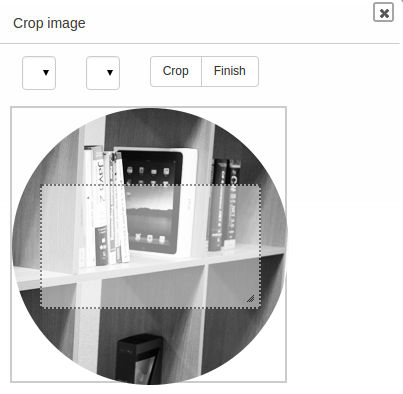
* Cropbox.js: jQuery Image Crop Plugin
A lightweight and simple JavaScript, Jquery, YUI plugin to crop an image.
Features:
Usage
Pure javascript
window.onload = function() {
    var options =
    {
        imageBox: '.imageBox',
        thumbBox: '.thumbBox',
        spinner: '.spinner',
        imgSrc: 'avatar.png'
    }
    var cropper = new cropbox(options);
    document.querySelector('#file').addEventListener('change', function(){
        var reader = new FileReader();
        reader.onload = function(e) {
            options.imgSrc = e.target.result;
            cropper = new cropbox(options);
        }
        reader.readAsDataURL(this.files[0]);
        this.files = [];
    })
    document.querySelector('#btnCrop').addEventListener('click', function(){
        var img = cropper.getDataURL()
        document.querySelector('.cropped').innerHTML += '<img src="'+img+'">';
    })
    document.querySelector('#btnZoomIn').addEventListener('click', function(){
        cropper.zoomIn();
    })
    document.querySelector('#btnZoomOut').addEventListener('click', function(){
        cropper.zoomOut();
    })
};
Jquery plugin
$(window).load(function() {
    var options =
    {
        thumbBox: '.thumbBox',
        spinner: '.spinner',
        imgSrc: 'avatar.png'
    }
    var cropper = $('.imageBox').cropbox(options);
    $('#file').on('change', function(){
        var reader = new FileReader();
        reader.onload = function(e) {
            options.imgSrc = e.target.result;
            cropper = $('.imageBox').cropbox(options);
        }
        reader.readAsDataURL(this.files[0]);
        this.files = [];
    })
    $('#btnCrop').on('click', function(){
        var img = cropper.getDataURL()
        $('.cropped').append('<img src="'+img+'">');
    })
    $('#btnZoomIn').on('click', function(){
        cropper.zoomIn();
    })
    $('#btnZoomOut').on('click', function(){
        cropper.zoomOut();
    })
});
// use with require js (new feature added on 9 Oct 2014)
require.config({
    baseUrl: "../",
    paths: {
        jquery: 'jquery-1.11.1.min',
        cropbox: 'cropbox'
    }
});
require( ["jquery", "cropbox"], function($) {
    var options =
    {
        thumbBox: '.thumbBox',
        spinner: '.spinner',
        imgSrc: 'avatar.png'
    }
    var cropper = $('.imageBox').cropbox(options);
    $('#file').on('change', function(){
        var reader = new FileReader();
        reader.onload = function(e) {
            options.imgSrc = e.target.result;
            cropper = $('.imageBox').cropbox(options);
        }
        reader.readAsDataURL(this.files[0]);
        this.files = [];
    })
    $('#btnCrop').on('click', function(){
        var img = cropper.getDataURL();
        $('.cropped').append('<img src="'+img+'">');
    })
    $('#btnZoomIn').on('click', function(){
        cropper.zoomIn();
    })
    $('#btnZoomOut').on('click', function(){
        cropper.zoomOut();
    })
    }
);
Take out every word that doesn’t contribute something new. Come back here and tell us about the before-and-after.
Categories
Tags
Favourite posts
Getting an e-Commerce website online might sound like a huge undertaking,...
WebView displays web pages. But we are interested not only in web-content...
Google Maps is a very famous and helpful service, which firmly entrenched...
RSpec is an integral part of Test Drive Development (TDD) and its main id...
When developing a web application that extensively works with user input ...
Field configuration defines behavior of all standart (system) fields and ...
As you might have already heard, the latest stuff for upgrading rails was...